I needed some stools for the table in our gazebo.
I was thinking something on the order of these at
mypatiogardenfurniture.com, but I'm too cheap to buy them and I couldn't find any easy plan to make them.
So I decided to
steal borrow
Ana's ladder table plans.
A little tweaking to make it sturdier to sit on and I think we've got a winner.
Here's hers:
And here's mine:
This is how I built them.
Tools I used: Materials:
Table Saw (2) 6 ft Treated Deck Boards (5/4" X 6")
Miter Saw 2" Deck Screws
Tape Measure
Carpenter's Square
Drill and bit including countersink bit
I pretty much followed Ana's plans except that I made them a little shorter and I used 5/4" treated deck boards instead of 1x3's and 1x2's. This did require ripping some of the boards on the table saw, but I wanted something that would be for outdoors.

This is the cut list of the pieces I used.
 Cut all the pieces to length with the miter saw, then rip all but [2] 14" boards and [2] 10 1/2" boards, which will be used for the seat and bottom shelf, to 2 1/2". [Leave the highlighted pieces full width.]
For all pieces: Drill holes for the screws and use a countersink bit to make depressions in the boards so the screws will countersink. Be sure the rounded side of the boards are all facing to the front for the seat, shelf and legs. For the seat and shelf supports, the rounded edge will be facing down.
Make the seat support by making a box frame with
[2]10 1/2" X 2 1/2" boards and [2] 5" X 2 1/2" boards. Square up the piece with the carpenter's square and use clamps to keep it in place. Make sure the flat sides of the boards are flush [even]. Screw it together using 2" coated deck screws. When you have all the screws in place, remove the clamps and set the middle 5" X 2 1/2" board in and repeat the clamping and screwing process.
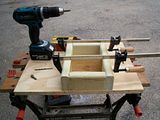
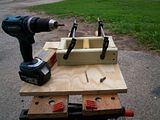
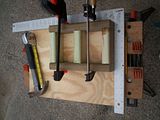
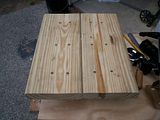
Assemble the seat by placing [2] 14" X 5 1/2" boards on top of the frame you just made and clamp to keep in place, and centered. At all steps be sure to measure, measure, measure, and make minor adjustments as necessary. Drill and screw down as before.
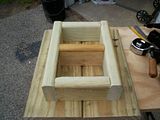
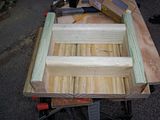
Build the shelf support similar to the seat support, except it will be a "ladder type" form instead of a box frame, using [2] 10 1/2" X 2 1/2" boards and [2] 9" X 2 1/2" boards. Attach the 9" boards 2" from the ends of the 10 1/2" boards, as shown in the image below.
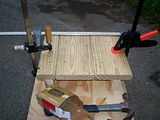
Assemble the shelf in the same manner as the seat, using [2] 10 1/2" X 5 1/2" boards and [1] 10 1/2" X 2 1/2" boards. The cut board will be the rear of the shelf, cut side to the back. The ends of the top boards will be flush with the ends of the 10 1/2" boards. Make sure you have a slightly longer overlap in the front than the back. Again, be sure to measure carefully and clamp in place. Drill and screw together.
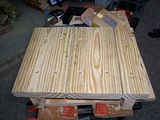
This is the finished shelf. Note the cut side at the back.
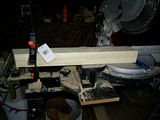
Cut the legs on the miter saw. Clamp the [2] front legs together and cut first one end at 20°,
through both boards. Measure for the length you want and cut the other side parallel to the first side, at 20°. Repeat this process for the back legs, except they are cut at 5°.

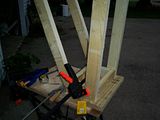
Assemble the stool beginning with a front leg and back leg on one side.
Make sure the rounded edges are facing to the front of the stool. Line up the back leg at the top to the edge of the seat support frame in the back and line up the front leg at the top to the edge of the seat support frame in the front. Here is a nice image from Ana that shows the position.
Clamp in place and drill and screw together. Repeat for the other [2] legs. Use the carpenter's square to make sure the legs are level with each other, front to back, side to side, and diagonally.
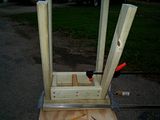
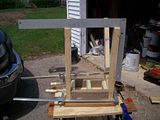
I did have to nip off the front corners at 45°, because it was just too sharp to slide onto next to the table. When I put a finish on these after the wood has dried, I'll sand down the edges a little so that there are no sharp edges.
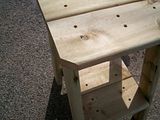
And here are the finished stools; sans paint and stain.

 5/15
5/15  5/27
5/27 6/8
6/8  6/18
6/18

 Cut all the pieces to length with the miter saw, then rip all but [2] 14" boards and [2] 10 1/2" boards, which will be used for the seat and bottom shelf, to 2 1/2". [Leave the highlighted pieces full width.]


 This is the finished shelf. Note the cut side at the back.


